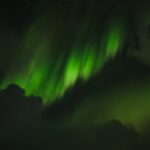
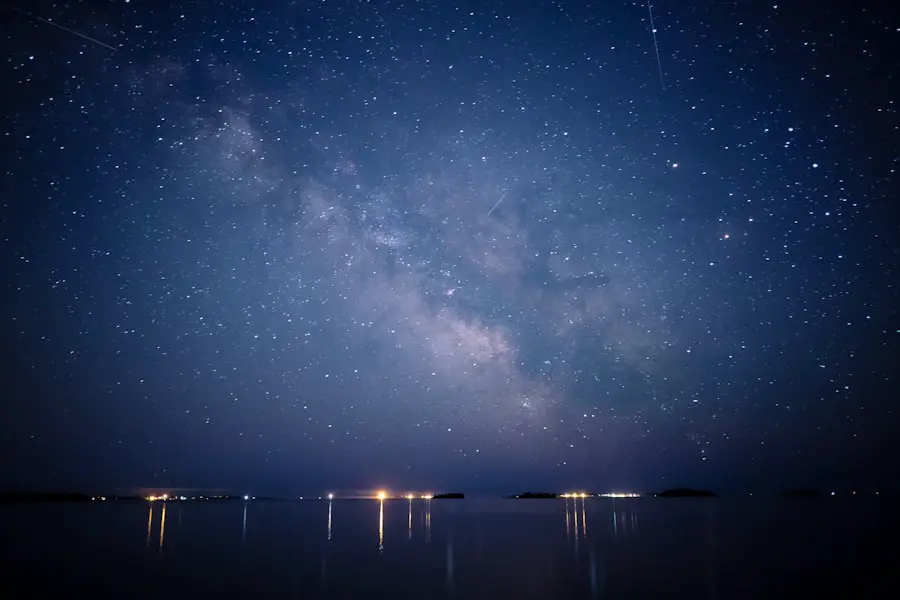
The Northern Lights, or Aurora Borealis, are one of nature’s most mesmerizing phenomena, captivating observers with their ethereal beauty. This natural light display occurs when charged particles from the sun collide with gases in the Earth’s atmosphere, resulting in vibrant colors that dance across the night sky. The most common hues are green, pink, red, yellow, blue, and violet, each produced by different types of gas and their respective altitudes.
For instance, oxygen at high altitudes can emit red and purple hues, while lower altitudes typically produce the more familiar green glow. The interplay of these colors creates a breathtaking spectacle that has inspired countless myths and legends throughout history. The science behind the Northern Lights is as fascinating as the display itself.
Solar winds, which are streams of charged particles released from the sun, travel through space and can interact with the Earth’s magnetic field. When these particles reach the Earth, they are funneled towards the polar regions by the planet’s magnetic field lines. As they collide with atmospheric gases, energy is released in the form of light.
This process is not only a visual treat but also a reminder of the dynamic relationship between our planet and the cosmos. Understanding this phenomenon enhances the appreciation of its beauty and can deepen one’s desire to capture it through photography.
Key Takeaways
- The Northern Lights are a natural phenomenon caused by charged particles from the sun interacting with the Earth’s atmosphere.
- The best locations and times to see the Northern Lights are typically in high-latitude regions during the winter months.
- Setting up your iPhone for Northern Lights photography involves adjusting settings such as exposure, focus, and using a tripod for stability.
- Using the right apps and accessories can enhance your Northern Lights photography experience, such as night mode apps and wide-angle lenses.
- Capturing the colors and movement of the Northern Lights requires experimenting with different techniques such as long exposures and time-lapse photography.
Choosing the Right Location and Time
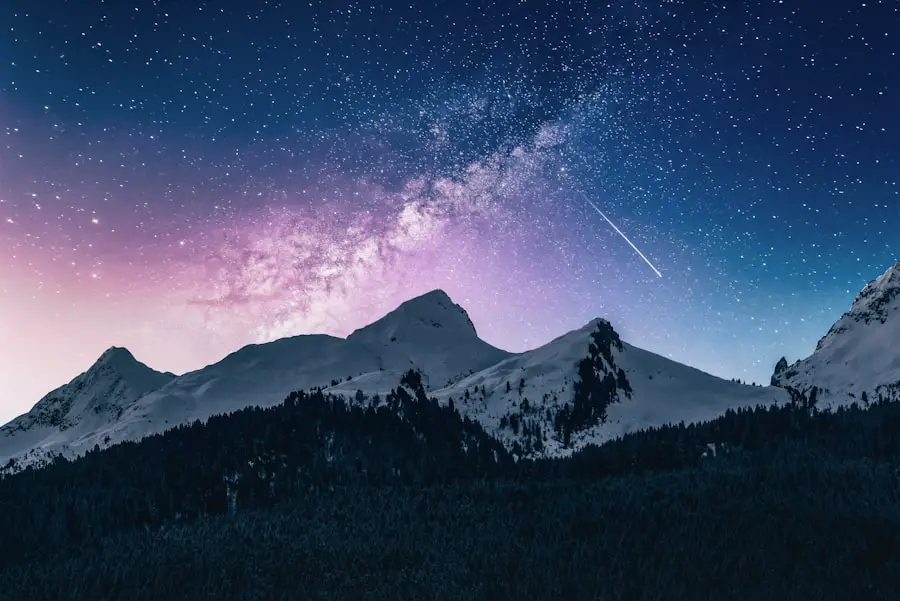
Selecting an optimal location for viewing the Northern Lights is crucial for a successful photography experience. The best places to witness this natural wonder are typically found within the auroral oval, a ring-shaped zone around the magnetic poles where auroras are most frequently observed. Regions in countries like Norway, Sweden, Finland, Canada, and Alaska are renowned for their stunning displays.
For instance, Tromsø in Norway is often referred to as the “Gateway to the Arctic” and offers excellent opportunities for aurora viewing due to its geographical position and relatively mild coastal climate. Timing is equally important when planning your Northern Lights adventure. The aurora is most visible during the winter months when nights are long and dark, typically from late September to early April.
However, peak activity often occurs around solar maximum periods, which happen approximately every 11 years. Checking solar activity forecasts can significantly enhance your chances of witnessing a spectacular display. Websites and apps dedicated to aurora forecasts provide real-time updates on geomagnetic activity, helping photographers choose the best nights for their excursions.
Setting Up Your iPhone for Northern Lights Photography
To capture the Northern Lights effectively with an iPhone, it’s essential to prepare your device properly. Start by ensuring that your iPhone is updated to the latest iOS version, as updates often include enhancements to camera performance and features. Additionally, consider using a model with advanced camera capabilities; newer iPhones come equipped with improved low-light performance and Night Mode, which can be particularly beneficial for capturing the aurora.
Before heading out into the field, familiarize yourself with your iPhone’s camera settings. Turn off any automatic features that may interfere with long exposure shots, such as HDR (High Dynamic Range) and Live Photos. Instead, switch to manual mode if available or use third-party camera apps that allow for greater control over exposure settings.
Setting your ISO to a higher value can help capture more light in dark conditions, while adjusting the shutter speed will allow you to control how long the camera sensor is exposed to light. A longer exposure time can result in more vivid colors and movement in your photos.
Using the Right Apps and Accessories
| Apps and Accessories | Usage | Benefits |
|---|---|---|
| Productivity Apps | Used for task management, note-taking, and document editing | Increased efficiency and organization |
| Health and Fitness Accessories | Used for tracking physical activity, heart rate, and sleep patterns | Improved fitness and overall health monitoring |
| Communication Apps | Used for messaging, video calls, and email | Enhanced connectivity and collaboration |
While the built-in camera app on an iPhone is capable of capturing stunning images of the Northern Lights, utilizing specialized photography apps can elevate your results significantly. Apps like ProCamera or Halide offer manual controls that allow you to adjust settings such as ISO, shutter speed, and focus more precisely than standard apps. These features are particularly useful when photographing dynamic subjects like the aurora, where conditions can change rapidly.
In addition to apps, investing in accessories can enhance your photography experience. A sturdy tripod is essential for stabilizing your iPhone during long exposure shots; even slight movements can result in blurry images. There are various tripod options available that are compatible with smartphones, ranging from compact travel tripods to larger models designed for stability in windy conditions.
Additionally, consider using a remote shutter release or a timer function to minimize camera shake when taking photos. This combination of apps and accessories will help ensure that you capture the Northern Lights in all their glory.
Capturing the Colors and Movement
When photographing the Northern Lights, capturing their vibrant colors and dynamic movement requires a keen eye and an understanding of how to work with light. The key to achieving stunning images lies in balancing exposure time and ISO settings. A longer exposure will allow more light to hit the sensor, resulting in brighter colors and capturing the fluid motion of the aurora as it dances across the sky.
However, too long an exposure can lead to overexposed images or trails that lose detail. Experimenting with different exposure times is essential for finding the right balance. Start with an exposure time of around 10-15 seconds and adjust based on how bright or faint the aurora appears.
If you notice that colors are becoming washed out or details are lost, reduce the exposure time slightly. Conversely, if the aurora appears dim in your initial shots, try increasing it incrementally until you achieve a vibrant representation of this natural wonder. Pay attention to how colors shift during your shoot; sometimes subtle changes can yield striking results.
Experimenting with Different Techniques
Photography is as much about creativity as it is about technical skill, especially when capturing something as unique as the Northern Lights. One technique worth exploring is incorporating foreground elements into your compositions. This could be anything from silhouetted trees or mountains to structures like cabins or ice formations.
Including these elements adds depth to your images and provides context for viewers who may not be familiar with what they are seeing. Another technique involves playing with different angles and perspectives. Instead of shooting directly upwards at the aurora, try tilting your camera slightly or finding a vantage point that allows you to capture both the sky and landscape together.
This approach can create a more immersive experience for viewers and highlight the vastness of the scene. Additionally, consider using time-lapse photography to document how the aurora evolves over time; this technique can produce stunning visual narratives that showcase both movement and color transitions.
Editing and Enhancing Your Northern Lights Photos
Post-processing is an integral part of modern photography that allows you to refine your images further after capturing them. Using editing software or apps like Adobe Lightroom or Snapseed can help enhance colors, contrast, and sharpness in your Northern Lights photos. Start by adjusting exposure levels; sometimes images may appear darker than expected due to low-light conditions.
Increasing brightness while carefully managing highlights can help bring out details without losing vibrancy. Color correction is another critical aspect of editing Northern Lights photos. The aurora’s colors can sometimes appear muted or inaccurate due to camera settings or lighting conditions at the time of capture.
Use tools within your editing software to adjust saturation and vibrance selectively; this will help emphasize those stunning greens and purples without making them look unnatural. Additionally, consider cropping your images to improve composition or remove distractions from the frame; this simple adjustment can significantly enhance visual impact.
Sharing Your Northern Lights Photography on Social Media
Once you’ve captured and edited your Northern Lights photographs, sharing them on social media platforms can be an exciting way to showcase your work and connect with fellow enthusiasts. Instagram is particularly popular among photographers due to its visual nature; using relevant hashtags such as #NorthernLights or #AuroraBorealis can help increase visibility among users interested in similar content. Engaging with other photographers by commenting on their work or participating in photography challenges can also foster community connections.
When sharing your images online, consider writing captions that provide context about your experience while photographing the aurora. Sharing stories about your location, challenges faced during shooting, or even technical details about how you captured a particular shot can enrich viewer engagement. Additionally, consider creating a dedicated portfolio website or blog where you can showcase a collection of your best work alongside detailed accounts of your adventures chasing the Northern Lights; this not only serves as a personal archive but also establishes you as a knowledgeable voice within the photography community.
By understanding the intricacies of capturing this breathtaking phenomenon through careful planning, technical preparation, creative experimentation, and thoughtful sharing practices, photographers can create stunning representations of one of nature’s most awe-inspiring displays—the Northern Lights.
If you’re looking to capture the beauty of the northern lights with your iPhone, you may also be interested in learning how to track text messages on your device. Check out this how-to guide for tips and tricks on monitoring your messages.